Mo Pros

How to Pick a Snowmobile Rack

66_MoPros_ArcticFox_Snowmobile_Snowboard_Rack.jpg

So you’ve got your snowmobile, but how can you maximize it’s durability, versatility and utility? The answer is simple. Get a gear rack. These racks can carry any number of things, from dry bags keeping your gear safe and secures, to shovels, food, beer, skis, snowboards, fishing equipment and so much more. They also act as tunnel stiffeners keeping your sled solid and safe.

Why Do I Need a Rack?

93_MoPros_Skidoo_Snowmobile_Snowboard_Rack.jpg

Gear racks give you much more versatility than your conventional industry snowmobile bag. When you’re spending long days in the backcountry, safety is of utmost importance and there’s a few things to always make sure to keep with you, but you don’t want weighing down you backpack. Sometimes depending on where you’re sledding, the terrain and trails may not be accessible, for which you should always keep a shovel for several purposes, as well as something to clear trails, especially right at the start of the season or after storms. You can also carry many other accouterments, thanks to being easily configurable, such as camera tripods, fishing gear, food, water, a case of beer etc.

Considerations When Picking a Rack

The most important thing to look for is build quality. Look for a system not reliant on plastics or soft stainless steel screws, you don’t want the thing keeping all your stuff safe to suddenly break and destroy your things. Next, look for something configurable. Your days in the backcountry will vary, sometimes you might want to hit easy trails one day, go fishing the next day and aggressively shred all day the next.

Look for something that will solve as many problems as it can, and that can be even further configured with insulated dry bags such as the Mo Pros Empire Bag

A good lifetime warranty is also important. You’ll be switching this things between sleds and using it season after season, you want to make sure you’re covered if anything happens to go wrong.

You don’t want something that will fall apart with one kick, get something quality. When you’re using a rack for the foreseeable future, the little bit extra cost is worth the peace of mind.

Discover & share this Build GIF with everyone you know. GIPHY is how you search, share, discover, and create GIFs.

Unexpected Benefits

74_BAC~1.JPG

Having your sled overheat in the spring time is a common issue. With a gear rack, you can pack it full of snow keeping your sled chill and stopping it from overheating. On the other side of the spectrum, certain designs of snowmobile racks can trap snow when you’re shredding in the regular season, putting unneeded weight on the tunnel, affecting how you ride. To avoid this, look for a rack that has enough holes and room on the sides to keep snow circulating, such as the Mo Pros Ajoosta Large rack.

While most racks focus on the ability to carry your skis and snowboards, they also provide the ability to sled up to a river, carry all your fishing gear, and have a chill day, to then hit the line you saw on the way there the next day.

A snowmobile rack supports a dynamic lifestyle rather than just being a backcountry skier, because sometimes it’s just about being able to spend some time in the mountains.

What if I Get a New Sled?

While not able to speak for all snowmobile racks, the Mo Pros Ajoosta rack is transferable between makes and models of snowmobiles. This is a one time purchase, instead of needing a new one every time you upgrade your sled.

Versatility

45_MoPros_Snowmobile_Heated_Boot_Bag.jpg

With the ability to carry snowboards, skis, avalanche shovels, chainsaws, fishing rods, ice augurs, guns, tents and more, a snowmobile rack provides new opportunities and frontiers in snowmobiling and making the back country your playground.

The New Hot’n Shreddy Bag is the first Heated Snowmobile Tunnel Bag on the market, letting your adventure and options roam free.

MoPros Mobile

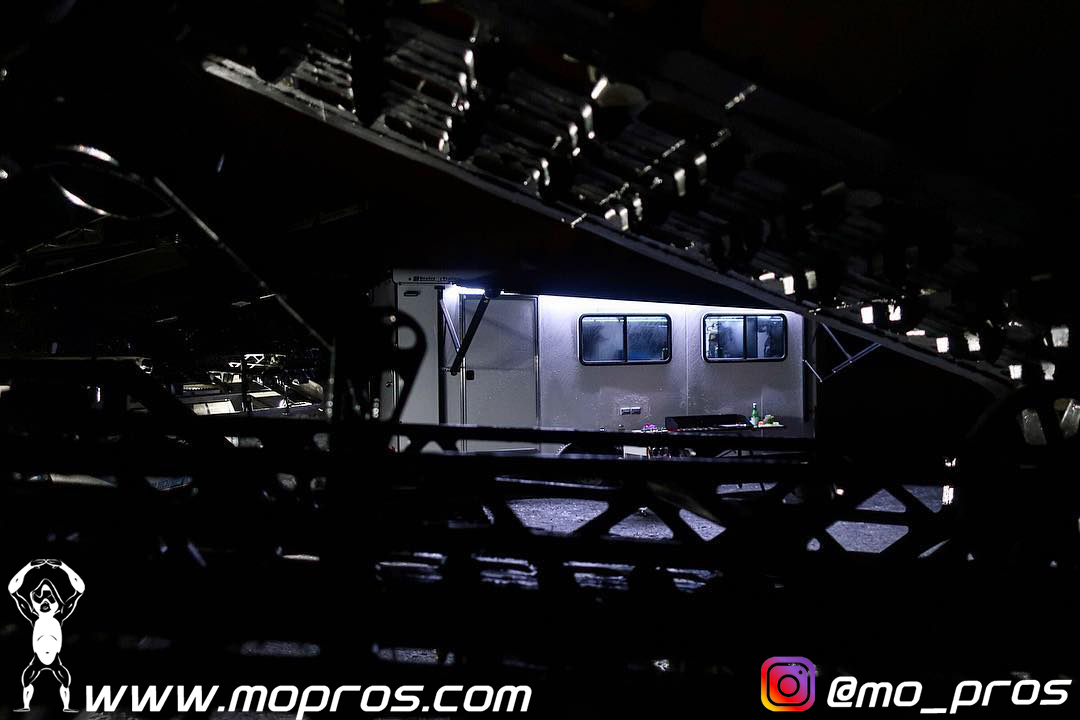
Recently someone contacted us and said: ‘You need to optimize your mobile business strategy’ and we took that pretty seriously. We knew right then our enterprise needed to remodel our business strategy. We had an idea, a concept, but needed a little direction; so we grabbed a bad ass bottle of scotch and headed to @thewoodslayer for design review. Together we designed a an airplane cabin style mobile trailer with optimized workflow for managing gear, handling moisture, and dealing with those bumps, dings, and scratches. To us we took this new ‘mobile strategy’ exactly in the right direction and we’re hitting the road with our new mobile optimized platform. This time we linked with @mikeheni for hand delivery of his Mo Pros rack and installed it under the lit canopy in Whistler. Of course @tcullen08 @narrshredder popped in for some shred days and a couple night stay. Totally off grid, we had all the required power with no need to go anywhere. Parked. Huge appreciation to the @thewoodslayer for his input and contributions to this project, the maiden voyage saw full occupancy at 5 adults without issues. Couldn’t have done it without you 🙏

Sea to Sky Snow Days

9_MoPros_Backcountry_Snowmobile_Snowmobiling.jpg

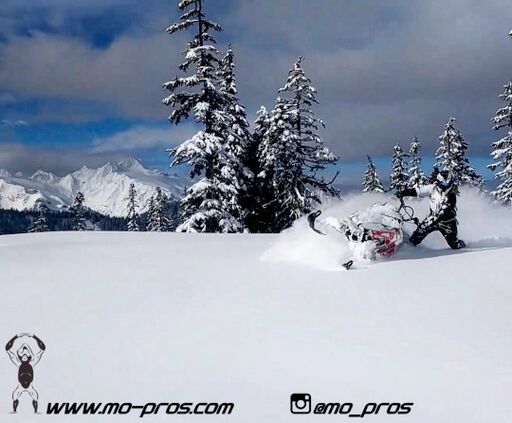
It’s nice when trips work out, especially when border crossings are involved. Got a great crew together and all met up in Canada to hustle hostels, @airbnb, and even stayed in a 5th wheel for the small incidental cost of a couple jugs (okay maybe 5 jugs). A lot of moving around and shuffling but worth every moment; what fantastic terrain. The Canadian snowmobilers clubs and even riders are also insanely friendly and helpful, being up here as a recreational user is a true experience and the states could take some notes on management for sure. If you haven’t experienced it we would highly recommend it. Snow quality was insane during our trip, the snow was puking in Squamish down to sea level making the snow at riding at elevation dry and just delightful. If you looked hard enough there was a crust pretty far under the new snow on a south facing slope, but you could only find with your face if you tomahawked hard enough.

Floating The Boat

Floating the boat. With the next wave of storms inbound weather windows will be short lived. On the other hand temperature set ups seemingly leaning towards blower pow. 
Long range models are also suggesting continued storms through late April; winter is kind of on a rally phase and gaining that typical La Niña momentum :)

Be Inspired and Ring the Alarm

The tour begins with Tanner Hall and John Spriggs, celebrating the success of the new film Ring the Alarm. Ring the Alarm is one of the few films which is coming out for FREE, meaning you can watch it as many times as you please, no downloading or purchasing required. Truly a free shout out to the fans.....which is hella sick.

We appreciate Tanner's commitment and energy in his latest 2 year project and were also fortunate to be a part of it.....supporting a video for everyone to enjoy and watch for free. The guys certainly did a ton of snowmobile access skiing and even snowboarding with the crew involved....something you obviously know we're down to have happen

Check out some of the content on www.newschoolers.com like the link below; the boys are touring this thing off and throwing one hell of a party.

http://www.newschoolers.com/news/read/BE-Inspired-Premiere-Quebec-City

Choosing the right Snowmobile or Snowbike Rack

Making purchasing decisions can be hard, especially when you're trying to differentiate based on true needs. However, when choosing a snowmobile cargo rack there are a couple things you want to consider.

Here's a couple considerations to think about:

  1. Riding Level and Aggression

  2. Carrying Capacity Needs

  3. Fusion of both 1 & 2

Let's begin with 'Riding Level and Aggression,' if you're an aggressive snowmobiler who spends a long days in the mountains, your strategy should be to keep your backpack as light as possible. This way you don't burn energy hauling gear around all day, especially when freeing up your friend who gets stuck all day.

Any of the Mo Pros snowmobile racks will eliminate weight from your pack, but if you're looking to stay low profile, haul a snow bungee, tool kit, first aid kit, lunch, etc........then try: Ajoosta GRS

**Carry Just the Essentials**

The GRS rack is designed to be compact, light weight, reversible, and serve as a functional storage solution for your snowmobile; keeping the weight out of your pack, your legs fresh, and providing long riding days is the goal. Versatility is critical, Mo Pros Snowmobile racks configure exactly how you want them to, tailoring to your specific needs. The Mo Pros snowmobile racks are also very easily removed (6 nuts) and fit Polaris Snowmobile Channel Systems and Ski-Doo snowmobile LINQ System without Drilling.

What if I'm an aggressive rider, with a serious backcountry agenda?

Well the Mo Pros Racks definitely support those who have a more serious plan in the mountains. If you're hauling camera equipment, supplies to the cabin, duffel bags for overnights, coleman stoves, a case of beer, chainsaw or anything else you could basically imagine.......then you need to step up the game and go with a larger snowmobile cargo rack solution.

If you want to stay light, sled aggressively, and carry all the eggs in the basket, then you need the: Ajoosta GRL

**You got the tunnel room, use it"


The larger model Ajoosta GRL is a functional rack which supports and strengthen the tunnel of your machine; allowing you to ride as aggressively as you want; with the security of keeping everything on board and not over stressing your chassis. You don't need to spend big money on snowmobile tunnel support, bigger bumpers, or other reinforcement accessories; the Mo Pros snowmobile cargo rack gives you what you need for the job; without compromise. 

The multitude of strapping and fastening options means you can transform your snowmobile into anything you can imagine, timely and efficiently. Until you actually get one, you won't understand how your options are truly limitless....we continually hear this from our customers.

Okay I get it, but I'm NOT aggressive and just want to have fun, now what do I need?

Mo Pros Snowmobile cargo racks don't only apply to the aggressive snowmobiler. If you're strictly a trail rider who likes to get out and spend time in the outdoors, then the consideration should come down to storage capacity. In that situation you probably don't want to have a backpack at all and should determine your cargo carrying needs to best make decisions on what model Mo Pros Snowmobile Rack is best for you.

All the benefits and features mentioned previously in the article are relevant, even to the most novice rider. Just be aware that you also get all the same supporting and functionality benefits as well; which is a platform that can easily support any riders progression.

Here's an easy break down:

  • You're not a functional snowmobiler, carry some essential things, out for a rip - Ajoosta GRS

  • Aggressive sledder, wanna bring a proper lunch, Stanley Thermos, Extra Layers - Ajoosta GRL

It may not be about performance benefits at this juncture, but you do get to choose how much you want to upgrade the backcountry experience. When it's spring time, we all know who's going to be grilling hot dogs in the sunshine.

Enjoy it out there, it's the experience we all live for.

Snowmobile Rack Carrying Features

The Ajoosta Rack by Mo Pros is a utility snowmobile rack, which you can modify and set up for your explicit needs. Backcountry travel is variable and the mission constantly changes......shouldn't your rack system too?

The Mo Pros Snowmobile Rack also accommodates carrying external devices, through accessory attachment options. Although the Ajoosta Rack has been well known in the industry for it's performance capabilities as a snowmobile ski rack and snowmobile snowboard rack, however the capacity reaches much farther for carrying options.

Snowmobile Rack External Bracket Carrying Capabilities:

  • Fishing Rod Cases

  • Skis

  • Snowboards

  • Pow Surf Boards

  • Marking Stakes

  • Camera Tripods

  • Snow Shovels

  • Tent Bags

  • Lawn Chairs

  • Gun Cases

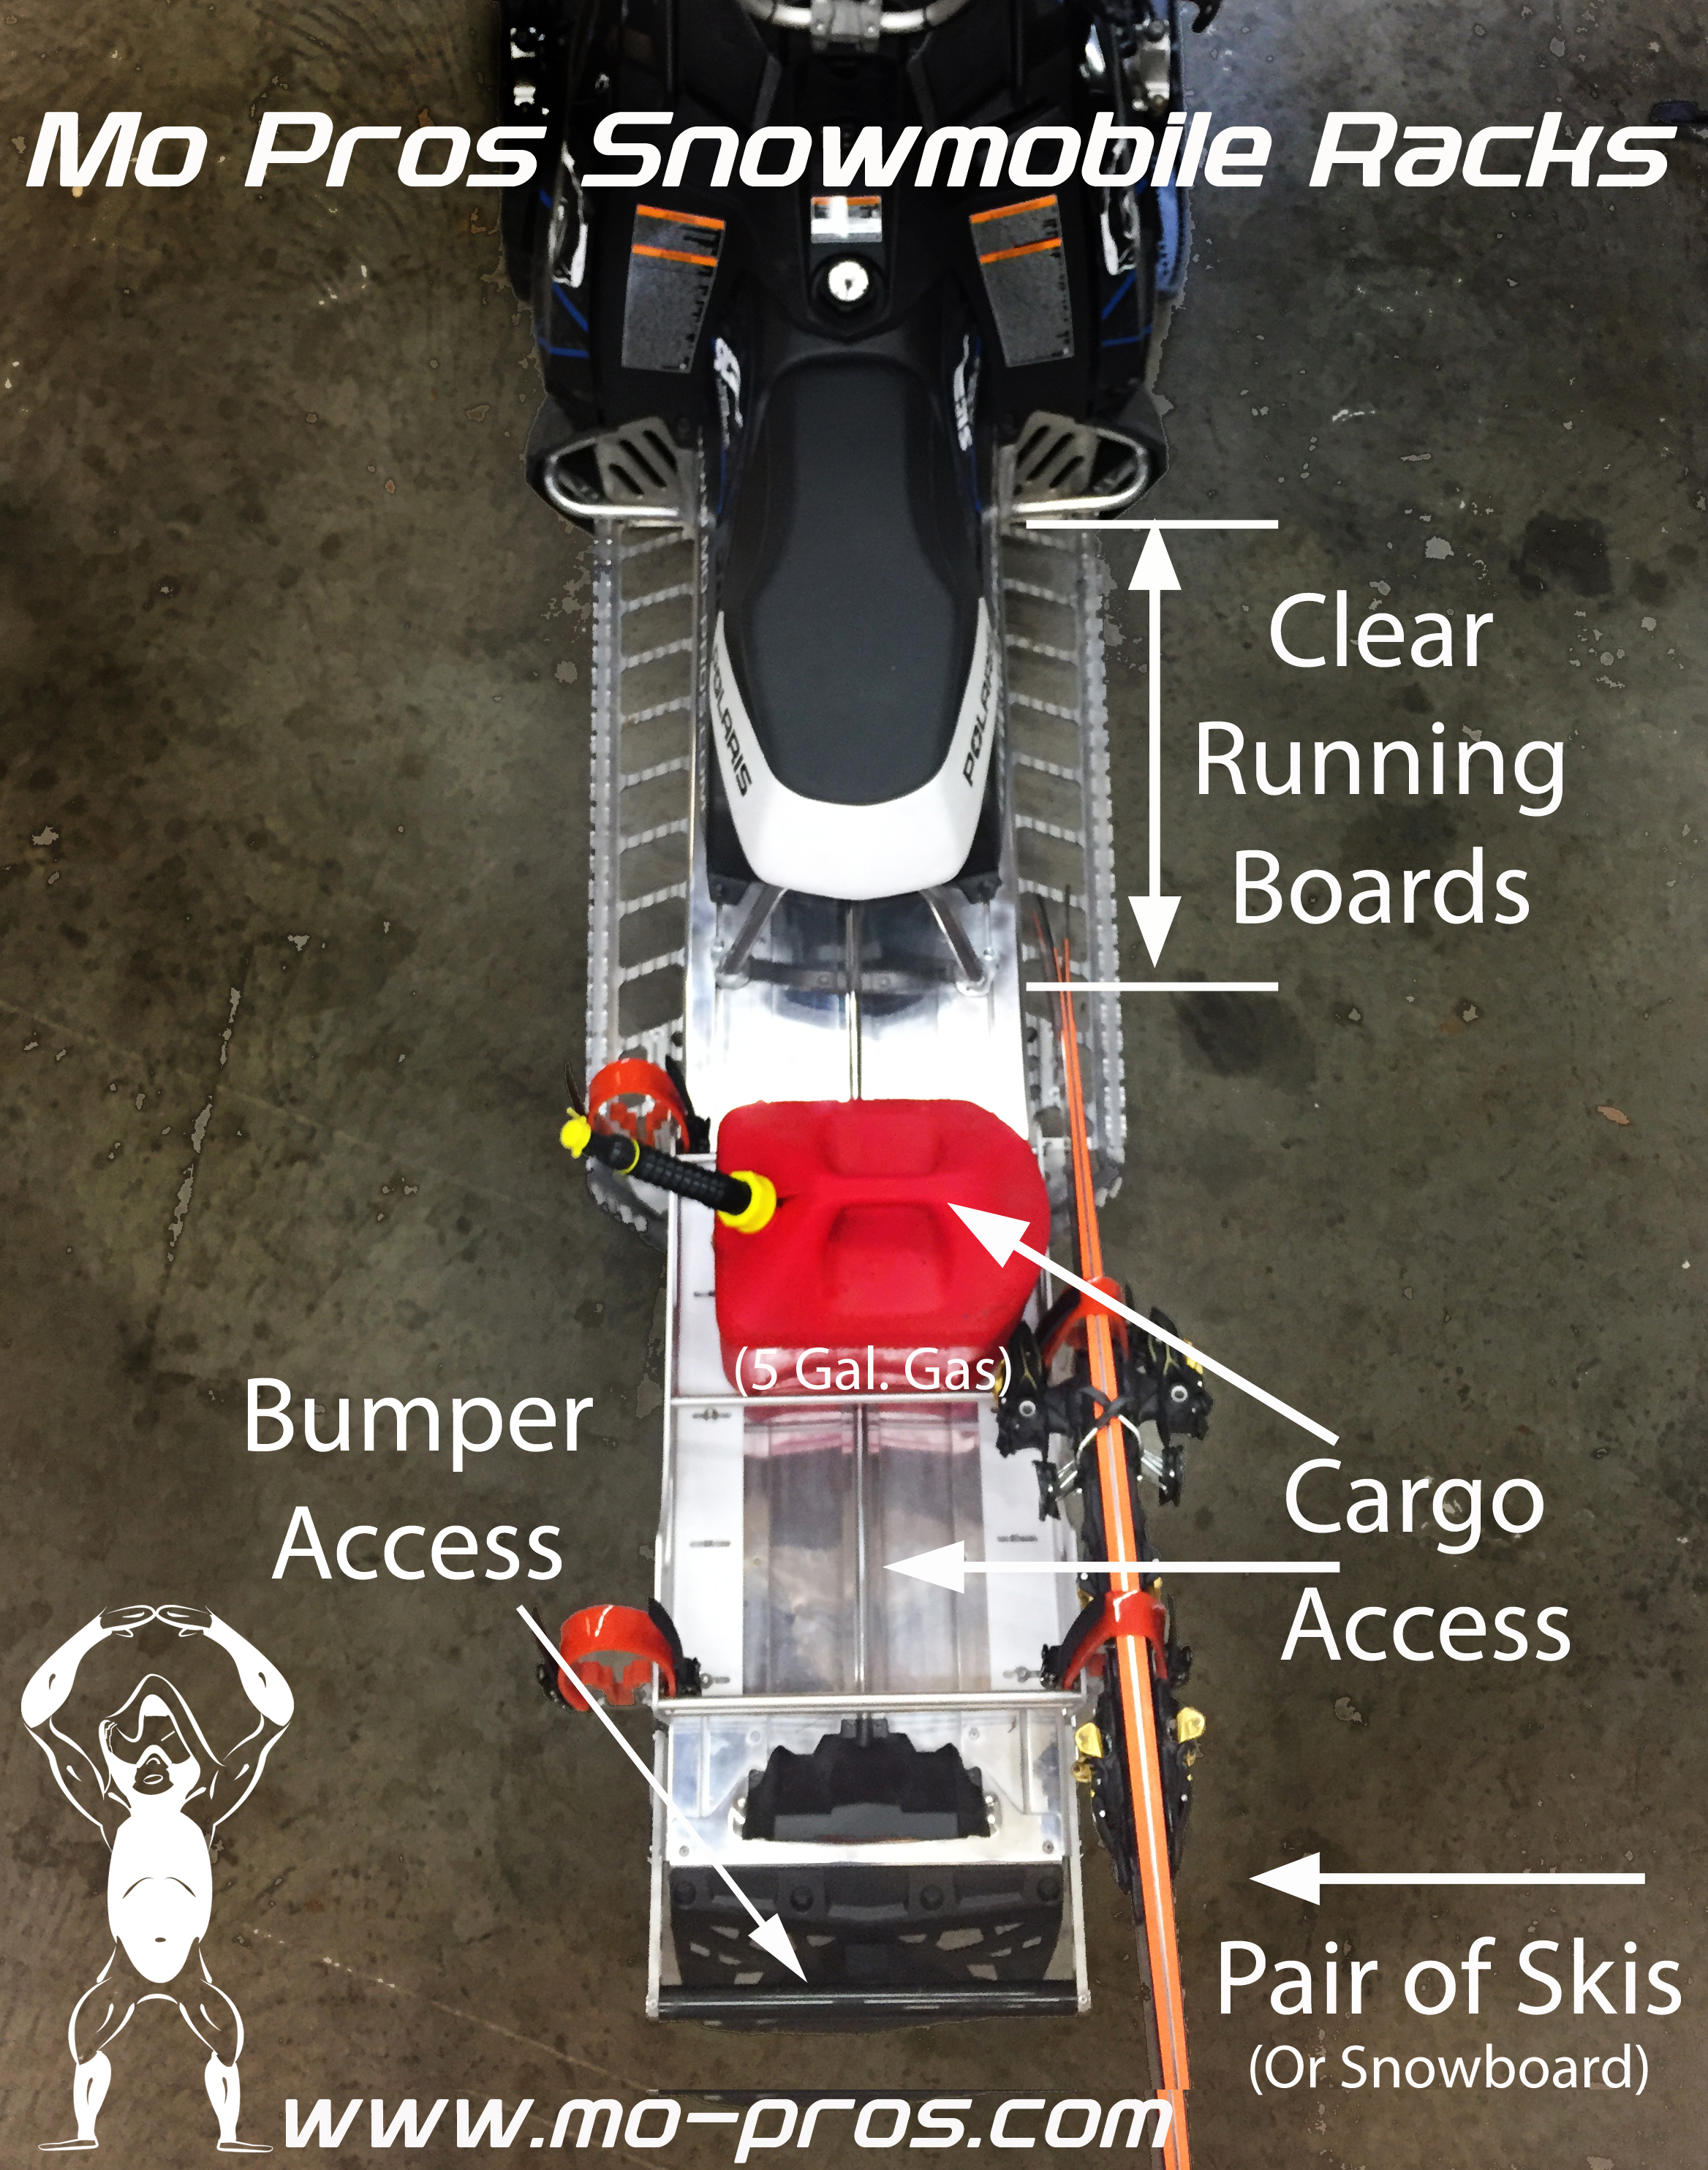
Now that you've got the carrying capabilities and customization to keep the cargo locked down on your snowmobile or Timbersled snowbike, it's important to distinguish what capabilities you still have. Sometimes when utilizing other products, product technologies may cross over other usable features, it's critical to think of these items when making Snowmobile Rack, Snowmobile Ski Rack, and or Snowmobile Snowboard Rack purchasing decisions.....check out the infographic below for details:

Mo Pros Snowmobile Rack Superior Design:

  • Leave Cargo On, Get Out of Holes Faster

  • Roll Machine with Cargo/Gear Secured

  • Clear Running Boards For Sledding

  • Weight Distribution Options - Better Flotation

  • Never Blocks Gear Bags/Cargo Access

  • Never Blocks Rear Bumper Access

  • Fastest Loading/Unloading Industry Wide

  • Access to System from Any Angle

The Mo Pros Snowmbike Rack is serious Backcountry Adventure Gear. Timberlseds don't have capability to carry cargo, so attaching a snowmobile rack for carrying gas and cargo is essential. As we become a backcountry united environment, it's important…
The Mo Pros Snowmobile Rack is competitive because it changes into a snowmobile ski rack and snowmobile snowboard rack. Polaris snowmobile integration is simple, but Ski-Doo is also well accommodated as we live in a very backcountry united atmospher…

Professional Backcountry Travelers

Professional Backcountry Travelers

The Mo Pros Rack system is widely utilized by various industry experts. This expertise ranges from supporting all the Avalanche Centers in the Continental West along with specific professional athletes, and of course professional backcountry travelers like you.

New Rack Versions Released for the 2015/2016 Season

Mo Pros is happy to introduce the latest rack versions for the 2015/2016 winter season. We are upgrading both rack designs this year based on various in field testing and feedback from our professional advocate teams through out the entire 2014/2015 season.

The new rack versions come with larger configurable options for securing whatever your needs are, upgraded components (cause why not), and marginally lighter without sacrificing strength.

The entire website has updated with the new version model numbers and be sure to select the updated version numbers when ordering wraps for your racks. Just look for the following models:

  • Ajoosta 1.1
  • Ajoosta 2.1

Have a great season out there.

Buying a Sled to Bag More Lines

It’s not secret that a new snowmobile is the ultimate accessory for a skier or snowboarder.

Snowmobile Suspension Set Up & Tuning

Let's just kick this thing off right. If you're having troubles with snowmobiling and thinking you just bought the 'wrong one,' go to a dealer and drop 13k to solve your problems....True or False?

Well hopefully we catch you in time, because the above statement is definitely FALSE. Did you know? The majority of dealers release snowmobiles into the hands of owners (new to snowmobiling or not) without any education or training behind adjusting the suspension set up for appropriate riding. Which means, you're likely riding your snowmobile at the general suspension setting which was applied by the dealer when you bought it.........but this is not a dealer bashing moment, because suspension set up is truly the snowmobile owners responsibility.

By now you might be running through the back log of memories regarding what types of adjustments you have made in the past, if any at all. What we are trying to achieve here is creating awareness of how to set up the snowmobile you own today or tomorrow in order to improve YOUR experience on the snow. We would even stress this entire discussion is more important when buying a snowmobile from a private seller.........

A brief example, if you want to side hill better your suspension has to be able to flex into the hill.....if you're set up too tight, you're working way too hard.


**Note: Any references to rider weight is considered with all gear. This includes fuel cans, back packs, avy gear, ski's/snowboards on board, and anything you're planning to eat for lunch.....


This blog post will address the suspension items you can set up on your sled, it would be advantageous to get your owners manual for reference of stock settings for this exercise. If you do not have your owners manual, search online and get it printed, the majority of manufacturers offer printable versions.

1) Shock Preload

What is preload? How does it work? Why does it matter? Preload is defined as the amount of compression applied to a spring, without being subject to additional applied weight.  If the preload is not set right (for the rider weight) then the body of your snowmobile will roll and dive excessively in corners. How do you know you have too much preload? Well the inner ski on a corner will typically raise up......To determine preload, start by getting your sled off the ground and unweighted. A convenient way to accomplish this is by running a ratchet strap off an 8 foot 2x6 which spans a few garage rafters. For this adjustment you can raise one end of the snowmobile at a time.

Coil Over Shock - Loosen the back adjuster off the spring until no pressure is applied, then measure free length of spring. With the free length measured, tension the back adjuster onto the spring, decreasing length of spring by 5 to 10 mm. Apply this to all front and rear shocks.

Nitrogen Gas/Air Shock - Gas shocks rely on oil and nitrogen to change preload, the Mo Pros Tune will be able to assist with the right oil for rider weight. Since you have the machine up in the air already, removing the shocks is easy and a service is about $75 per shock for an oil swap and rider specific tune.

Air Shock - Adjusting the air pressure will congruently adjust the preload and spring rate. Utilize the set up manual provided to determine starting set up psi for tuning.


**Note - Did you know the front shock in the rear suspension system is the most forgotten yet the most important? This shock does the majority of the work in the rear suspension, taking all of the hits from bumps first, and controls weight transfer contributing to bite/traction on acceleration; this is especially true with the newer rider forward snowmobile geometries.


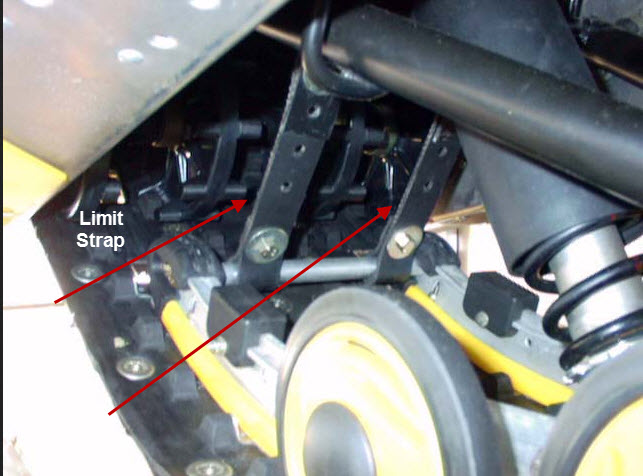
2) Limit Strap & Coupling System

The limit strap is a way to determine where your engines torque is placed along the length of your track and where the track will grab most when applying more throttle. Some sleds provide separate adjustment in this area but otherwise (like a 2011 or newer Polaris Pro) the adjustment is all in the front most shock of the rear track. If the shock is tighter in preload, you would conceptually be shortening the limiter strap.

Place the sled on a hard and even surface. Turn your attention to the start of the track and front part of the rails and verify the limit strap is free of tension. You should be able to move this back and forth with ease and it connects the front part of the rails to the front torque arm. If there is tension on the limiter strap, loosen it into longest position to relieve tension.

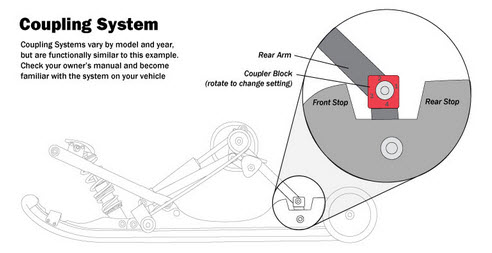
Depending on snowmobile type, you could have a coupling system as well. If equipped, set the coupling system adjuster device in an uncoupled position. Also, be sure to check your owner’s manual to find your specific sled’s neutral setting.


Congratulations! You have successfully set your snowmobile to complete neutrality. A snowmobile will be more successful when you have achieved the appropriate energy transfer and you want this 'balanced'. Wheelies are cool, but if you want to make it to the top your track generally needs to be in contact with the snow..... Let's keep moving.


3) Verifying Even Weight Distribution

Walk a few steps back from the side of the snowmobile, crouch down and site the skid frame rails. Have a close look, ensure they are resting flat by seeing how the paddles in the track make contact to the floor.

3a) Front Rail - Where the skid frame turns flat on the front of the the rail, inspect and verify this is contacting the ground. If it's not, verify your limit strap is entirely free of tension and on the last hole position. Do not remove the limit strap entirely, real bad idea.

3b) Rear Axle - If the rear axle is off the ground, the front shock preload is likely too soft and allowing the front end to sag. Tighten the preload on both front shocks evenly, shifting weight to the rear of the track until it touches the ground. BE SURE you only use the skidrail at the rear axle mount as the reference point. Some snowmobile models have raised rails (Polaris) which move up towards the end of the track. It's good to have a spotter here, allowing front preload adjustment with eyes on the rear skid rail.

4) Front Free Sag

Free sag is defined by: How much the suspension in any vehicle compresses under it's own weight. This means you should not be standing on it or have any tools piled on it either....just saying. The typical target range of free sag is 20% of the total front travel

4a) Measuring the front free sag can be accomplished by using the front bumper as a reference. Start by lifting the snowmobile at the front bumper until the shocks are fully extended (do not lift the skis off the ground) and record the measurement from the floor, then lower back to the floor. This measurement is the total travel height.

4b) Bounce on the front bumper and compress the suspension 3-4 times, then allow the front suspension to return to resting position. Take an additional measurement at the same location of the front bumper and record. This is your Free Sag Measurement

4c) You have now successfully measured your free sag. Increase or decrease front shock spring preload by as needed to achieve the free sag. Utilize the information below to attain appropriate Front Free Sag Height measurement.

  • Technical Terrain Riding: 1" - 2" Free Sag

  • Trail Riding/Semi-Technical Riding: 20% Free Sag

20% Free Sag Calculation: (Fully Extended Measurement) / 1.25 = 20% Free Sag

5) Rear Free Sag

Lift up the rear off the ground by the grab bar located on the end of the tunnel. If your sled is already at full extension, you are 'topping out.' Which means your preload is too stiff and needs to be reduced in the rear most shock in the track. Additionally if the rear slams into extension very quickly try reducing preload on front shock in the track, also confirm your torsion bars (skidoo) or shock springs are not set to the stiffest setting.

5b) Gently set the rear down on the ground, cycle the suspension a few times, and allow to rest. Take note the suspension will settle and compress under it's own weight. Friction between the rails and the track make it difficult to get a consistent measurement here, but do your best. The most important thing when checking rear free sag is to make sure you have some sag and are not topping out as mentioned above.


Alright! You have made it this far and ready to get into what is referred to as Race/Loaded Sag. Race/Loaded Sag is defined by: the suspension amount which is displaced by the rider weight (fully geared), luggage, skis/snowboards, cargo, and or additional passengers.


5) Setting Race/Loaded Sag

Load your snowmobile with the typical contents you bring out with you when you go riding and don't forger to gear up yourself too,  no sense in skipping steps, we are this far now.

5a) Snowmobile with Coupler Blocks - With the sled weighted, the coupler blocks should not be resting on the rear stops when the snowmobile is loaded with the rider and any other gear. Adjust your torsion spring settings to change where the coupler blocks rests. The torsion spring should be adjusted to the stiffness which results in the coupler block being as close to centered between the stops.

5b) Snowmobile without Coupler Blocks As mentioned earlier, the friction between the skidrails and the track will make it challenging to receive consistent measurement. However, check your manual to ensure the manufacturer has not set specific sag measurements to adhere to. Typically if no measurement is outlined by the manufacturer, the desired sag can be 2 - 2 1/2" with the machine full loaded with all gear and rider. Adjust your springs, torsion springs, or air to achieve this sag level.

**Note: As an example, if you're running the Mo Pros rack set up, you're going to have a bag with pretty much defined weight on the snowmobile......cause it's all about keeping that backpack light to conserve rider energy. You'll wanna load the rack up with what you expect to bring with you, cause this will impact your overall race sag numbers.


**Note: We did not mention much about the front preload and shock settings with all the rear adjustments made in Step 5. With more modern snowmobiles, there is usually very little impact of rider weight with front end adjustments. However, we encourage you to check this measurement and prove the race/loaded sag maintains the 20% value as a double check on work. Also, depending on your ride quality preference, this can change as you actually hit snow, going softer OR firmer. Always ensure you have 3/8" of preload on the spring, that is the minimum allowed amount.


Conclusion:

This set up guide should get your machine started in the right format for your riding needs. From here it's recommended you RIDE the snowmobile and begin paying attention to how it behaves and reacts out on the trail and in deeper snow conditions.

We have included some typical troubleshooting tips for you to further tune your snowmobile based on things you experience while riding. Remember, make one adjustment at a time to track progress and behavior. You're going to have this machine for a while and there's no need to rush set up when you can get it perfect to your needs; pay attention to what the machine is telling you and remain patient.

Further Diagnostics and Snowmobile Suspension Troubleshooting

Problem: Body rolls or dives in corners

Possible solution: Try adding preload to the front springs. If your snowmobile comes with a progressive wound coil spring, there might not be enough initial rate available without affecting ride quality at the mid and bottom of the stroke. Installing a single-rate spring or a more-effective dual-rate setup with adjustable ride height and rate is an effective solution.

Problem: Snowmobile still wheelies and raises skis off ground

Possible solution: This is an indication of too much power transfer to the rear of the snowmobile with a fulcrum type effect. If you have already performed appropriate preload adjustment on the center shock AND set the snowmobile suspension tune for accommodating race/loaded sag (Step 5 in guide), try tightening the limiter strap by one position or adding 1/2 turn of tension to the front track shock.

Problem: Sled tips up in corners, lifting the inside ski

Possible solution: Lower the front ride height to reduce the vehicle’s roll center. A sled with a lower center of gravity will typically outperform a vehicle that sits up high. Most roll or ski tip situations are generally related to excessive spring preload that was added to increase bottoming resistance.

Problem: Heavy steering

Possible solution: Heavy steering can be tricky to solve, and adjustments in the rear suspension often affect the cause. If you are experiencing this on a sled with stock skis and carbides, check the rear torsion spring setting, center shock spring preload, and possibly reduce the amount of coupling action. Make sure center shock spring preload is 5 to 10 mm. Typically, more preload to the center spring causes track spin, rear kick-up and a harsh ride. Remember, when you create load in the rear, the load is transferred to the front. In some cases more torsion spring preload will reduce load to the skis by holding the rider higher in the travel and away from the coupler stops.

Problem: Skis come of the ground when trying to accelerate out of corners

Possible solution: Make sure that your ride height is set correctly and you have good front to rear balance. In many cases we have found that increasing the rate of coupling or increasing rear track shock preload (which reduces weight transfer) transmits more load to the skis. Always make spring preload adjustments by 1/2 turn each time.

Problem: Front end raises up easily and then drops with little effort

Possible solution: One of the most common causes of excessive rear sag is a geometry-related issue such as the front torque arm limit strap is pulled in or the vehicle isn’t resting on a flat surface. It’s rare for a snowmobile to sag from weak torsion springs or shock springs. One of the most common misunderstandings is the shock has failed, causing excessive sag. The reality is a shock with a fresh charge may help a little bit, but it’s insignificant. Instead, check ride-height settings.


Source Articles:


See What We See........

If I can attain the riding ability these ladies had in 2008, then I can finally chalk up a 'Win' for snowboarding and make the transition on to sailing.

Roadside Assistance

Change your season from standard resort days and latte's to overnights, parking lots, and exploring.

Transworld Snowboarding 2014/2015 Gear Guide

Transworld Snowboarding has completely redesigned the Gear Guide in 2014/2015, focusing more on key innovations within products to assist in consumer purchasing decisions.